
Imagine you’ve exported your manuscript from Fictionary, and it’s ready for copy-editing or sharing with your writing group, beta readers, or editors. How do you keep track of notes, comments, and suggested changes? How do you identify areas needing the most work? You could create a separate document (digital or, gasp, paper), but you’d have to find a way to match the suggestions with the particular passages. Fortunately, Microsoft Word includes the perfect tool: Track Changes.
What is Track Changes?
Microsoft Word’s Track Changes feature is invaluable when you or others make memos or changes to your document. You only need a basic familiarity with Word and a willingness to try something new. Then, it’s as simple as turning on the feature and making the changes. The program works its magic in the background highlighting additions, deletions, and moved passages.
When paired with the Comments feature, Track Changes provides a comprehensive communication system for self-editing and working with others. For this article, I’ll refer to the current version of Microsoft Word 365, circa summer 2022. I’m using an Apple Mac, but most features apply to the Windows version.
Benefits of Using Track Changes
Track changes and comments work together to increase a writer’s self-editing and revision productivity by improving focus, differentiating commenters, providing streamlined, in-line communication, and acting as a handy revision checklist.
Writers wear two hats—the writing hat and the editing hat. It’s as essential to set aside the writing hat when editing as it is to set aside the editing hat when writing. Track changes and comments help writers focus on the editing process because of its location, setup, and visuals.
Track Changes and Comments live in the Review tab. This location, far from the Home tab, helps ground the task: review time isn’t drafting time.
Word lets every user set up their name, initials, and track change visuals. You can customize the color coding of any changes.
Each change and comment includes the reviewer’s name, making it easy for the writer to tell who made a particular suggestion. Reviewer stratification also makes it easier to gauge the number of reviewers who may have similar or differing opinions. If multiple reviewers comment on losing interest at a certain point, you know where to direct your revision and rewriting efforts.
Track Changes and Comments are convenient because the annotations stay in your document, and there is no need to keep multiple files or extra pages or documents. Each revision and comment can be addressed in a shared document, offering a directed communication tool to hammer out sticking points and questions near the text.
Track Changes allow the writer to visualize changes and comments in several formats: comment balloons and a revision panel. Each can function as a working checklist, further easing the review process as you work through and resolve each issue.
Getting to know Track Changes
You’re probably familiar with the Home tab on the far left. The Home tab houses the most commonly used word processing functions. The track changes and comments functions reside on the Review tab, further down the menu.
Here’s a big-picture view. I like this separation because it helps me shift from writer mode (Home) to Revision mode (Review.)
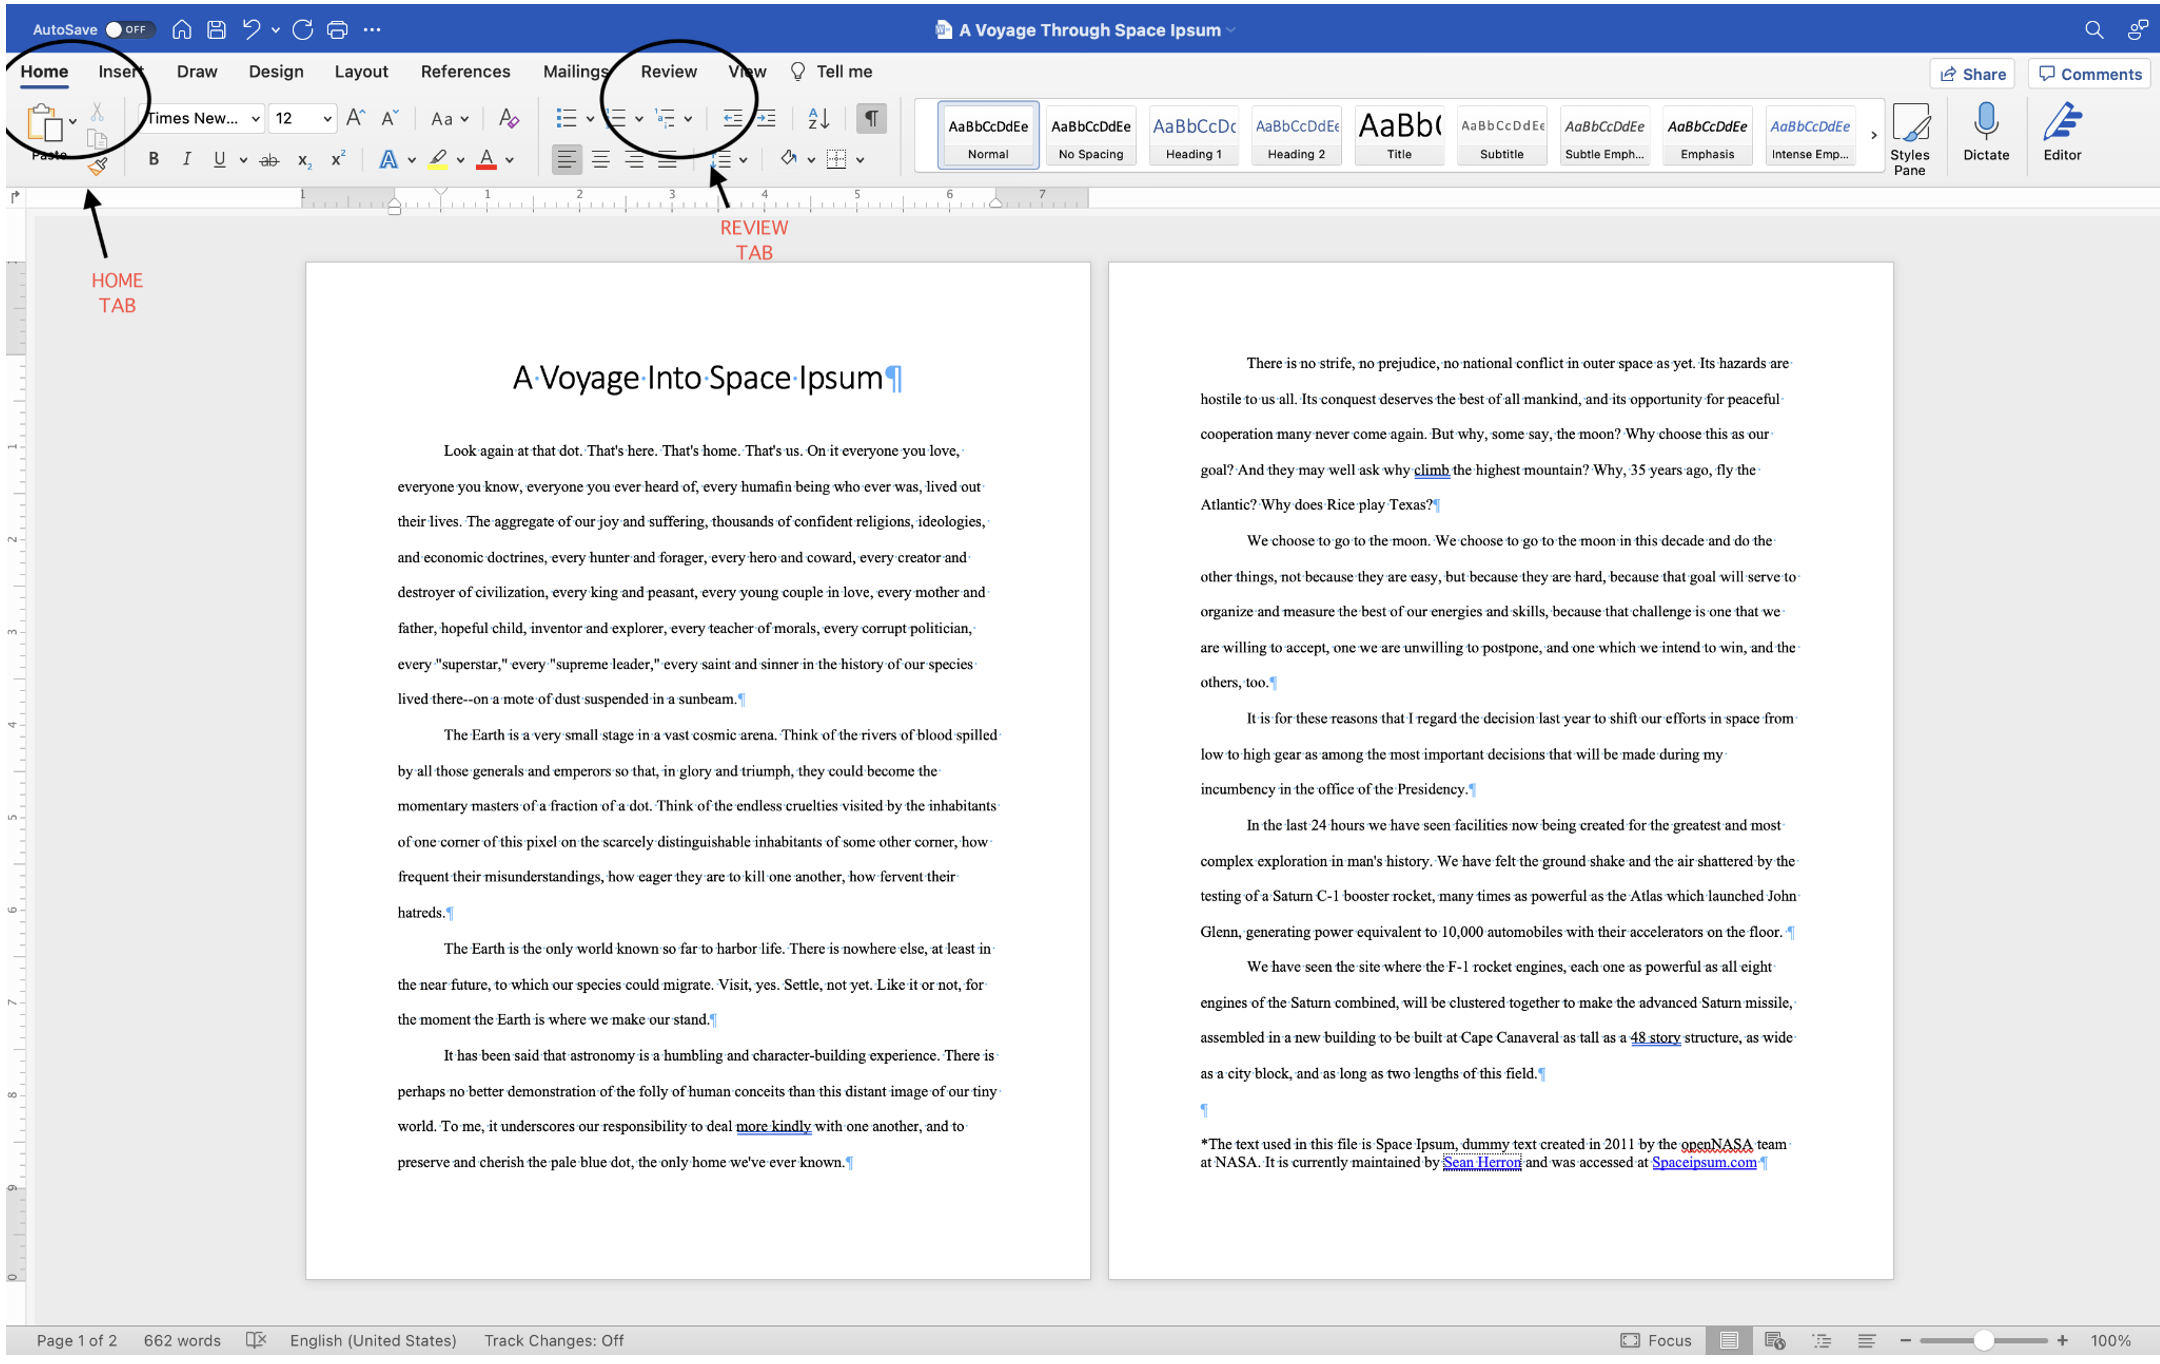
Closer views of the Home and Review tabs:
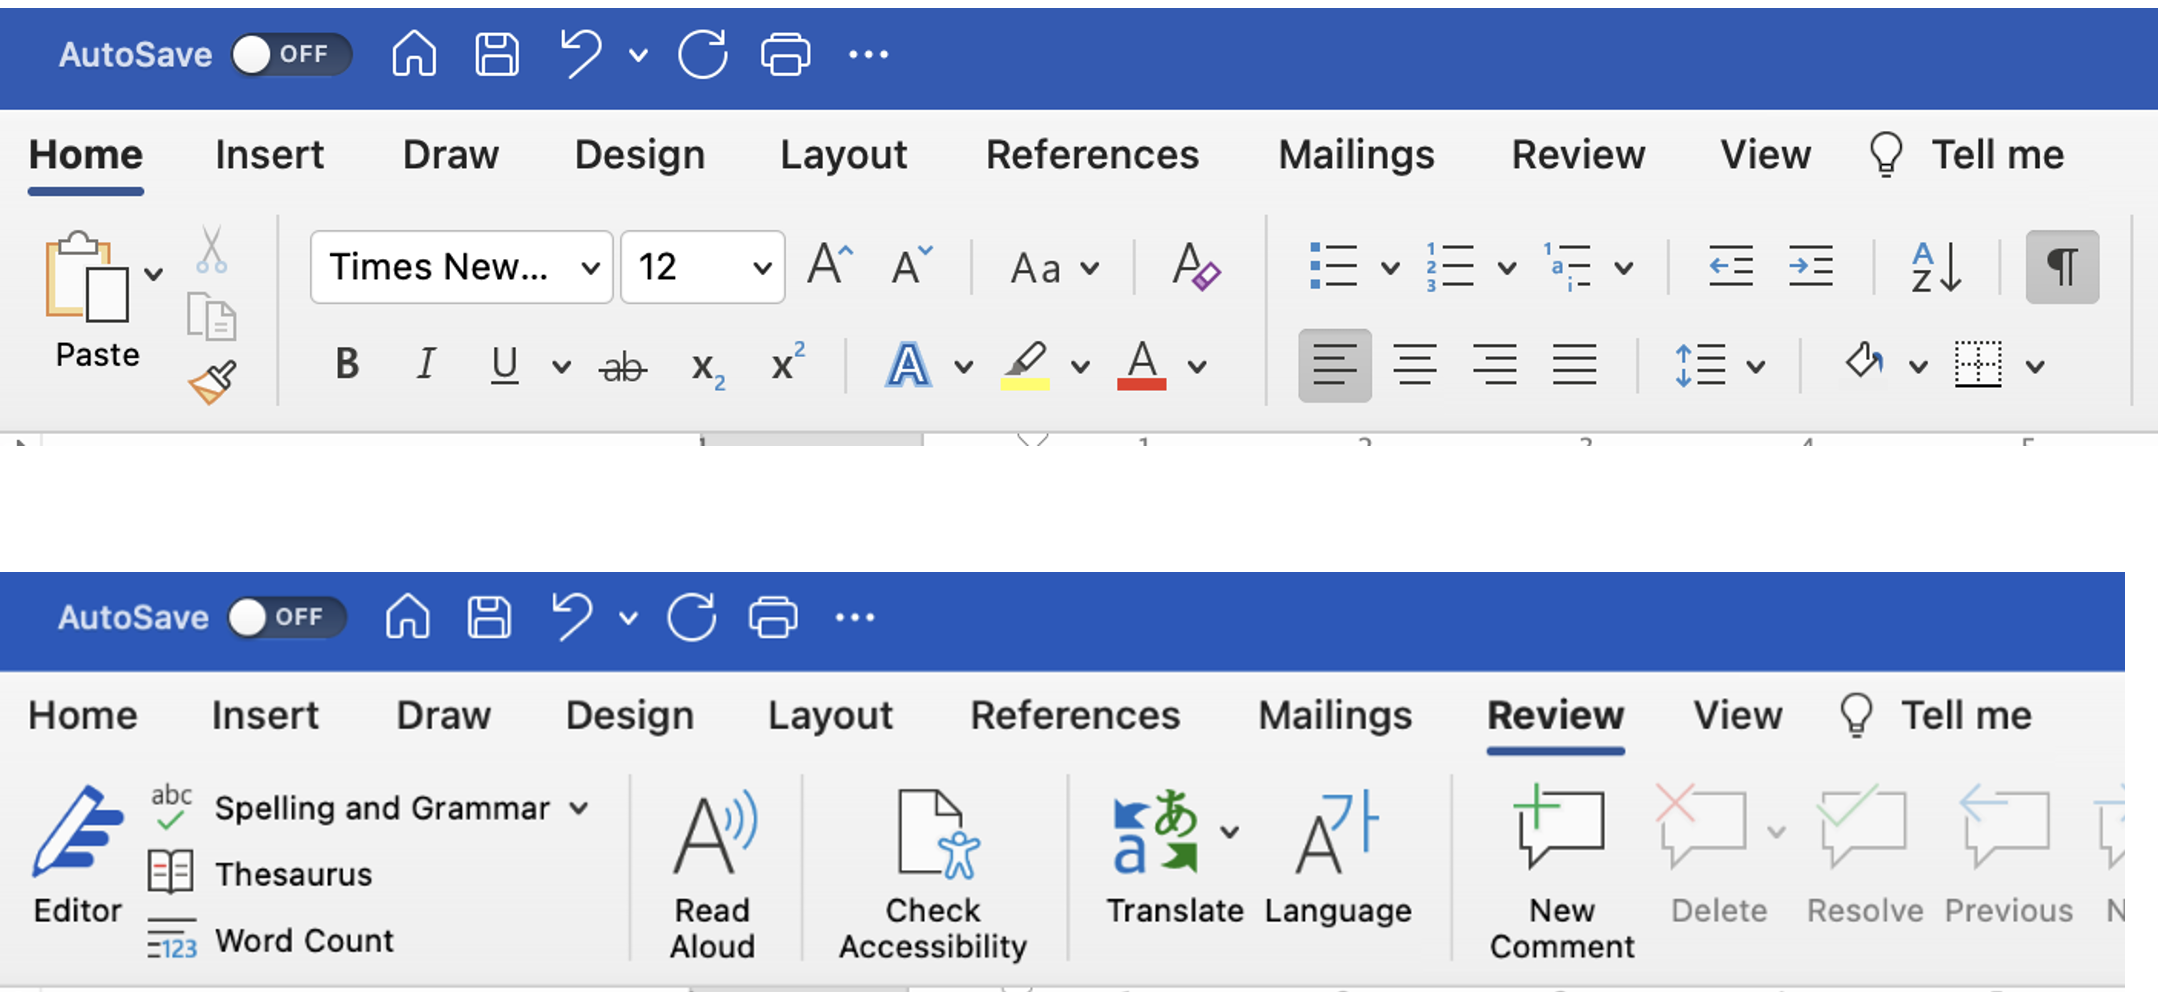
The Review tab includes the Editor (Word’s revamped spell checker), grammar, thesaurus, word count, and read-aloud functions. If read-aloud is new to you, check it out. Many writers use it to gain an objective sense of a scene’s flow.
The two most crucial Review functions are Track Changes and Comments. Track changes is OFF when the button is the default light gray:

Track changes is turned ON when the button darkens.

Click the large Track Changes button to toggle it on and off. That’s all there is to it. As long as Track Changes is on, MS Word will monitor any changes you or others make to the document.
Next, adjust how you want to view those changes. Word gives you several options in a dropdown menu: Simple Markup, All Markup, No Markup, and Original.
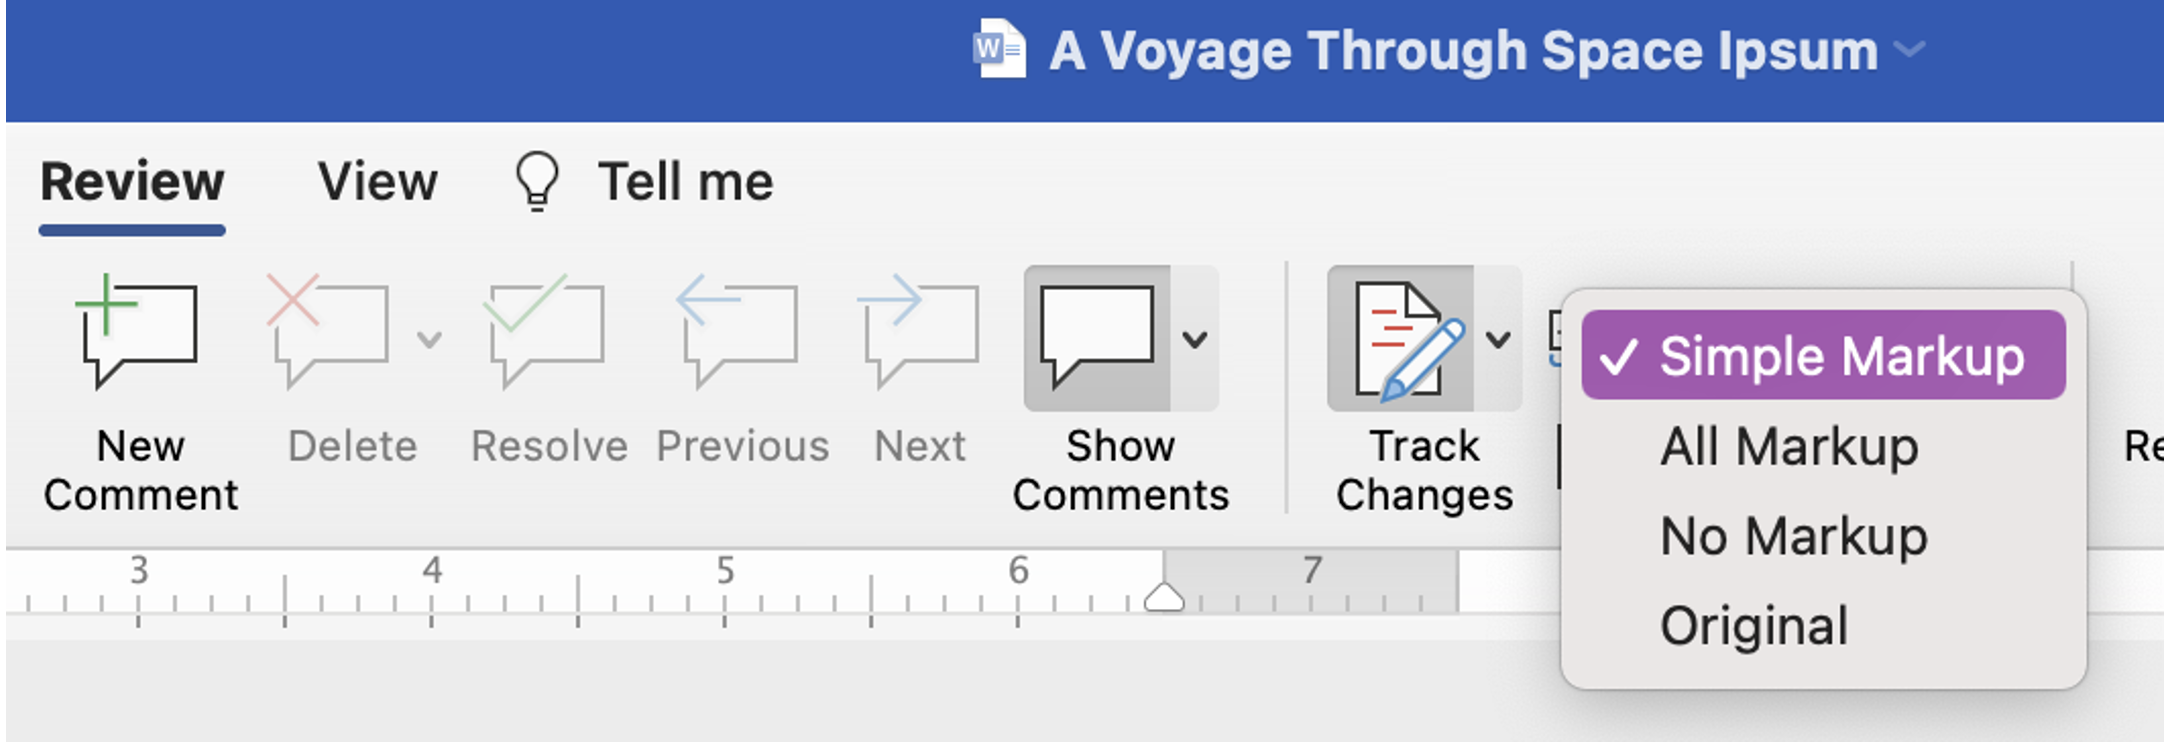
No Markup retains the changes but shows no markings, and Original only shows the original text. All Markup shows additions as colored underlines, deletions as strikethroughs, and moved text as double underlined/double strike throughs. These are defaults. You can change the markup look and colors by selecting Markup options > Preferences.
All Markup shows the most data but can quickly clutter the document. Simple Markup shows less on the page and only indicates changes with a vertical line on the left of the manuscript. Under Manuscript Options, you can choose to show revisions in-line or in comment balloons.
How to Use Comments with the Recommended Change
Add comments by clicking “New Comment.” A balloon will pop up on the right, listing your name and a place for your notes. If you set up Markup to show in balloons, all those tracked changes will show up separately. Things can get cluttered quickly, making Simple Markup the best option.
The beauty of the comments function is that it’s easy to see the name of every person who makes a change, note, or query about the document. You can address specific questions and notice the frequency of comments about certain passages.
The last section to view is the Review Panel.
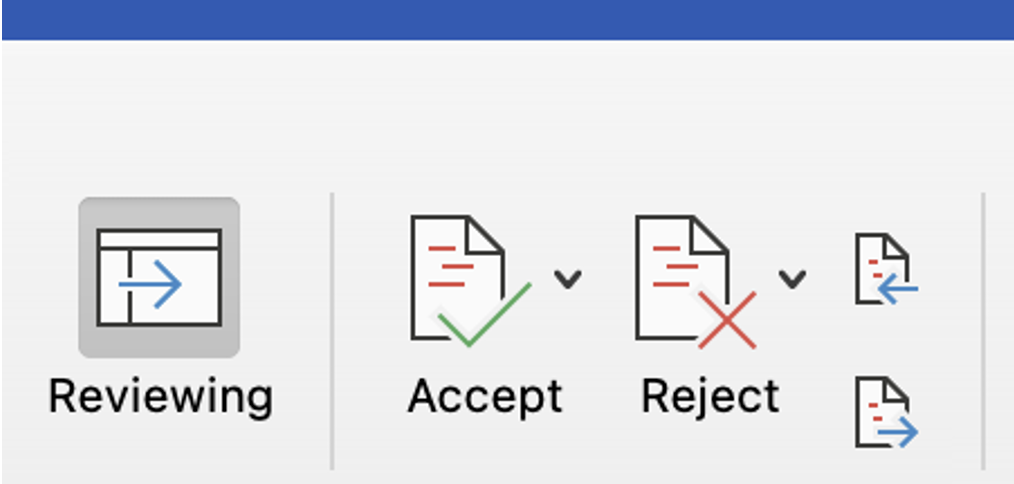
Click on Reviewing, and a list of all the changes comes up. As you address each, select accept if the change is acceptable or reject if you want to leave the text as is. Move down the document until you’ve accepted or rejected everything.
Here is the Review Panel with a few sample changes ready to accept or reject:
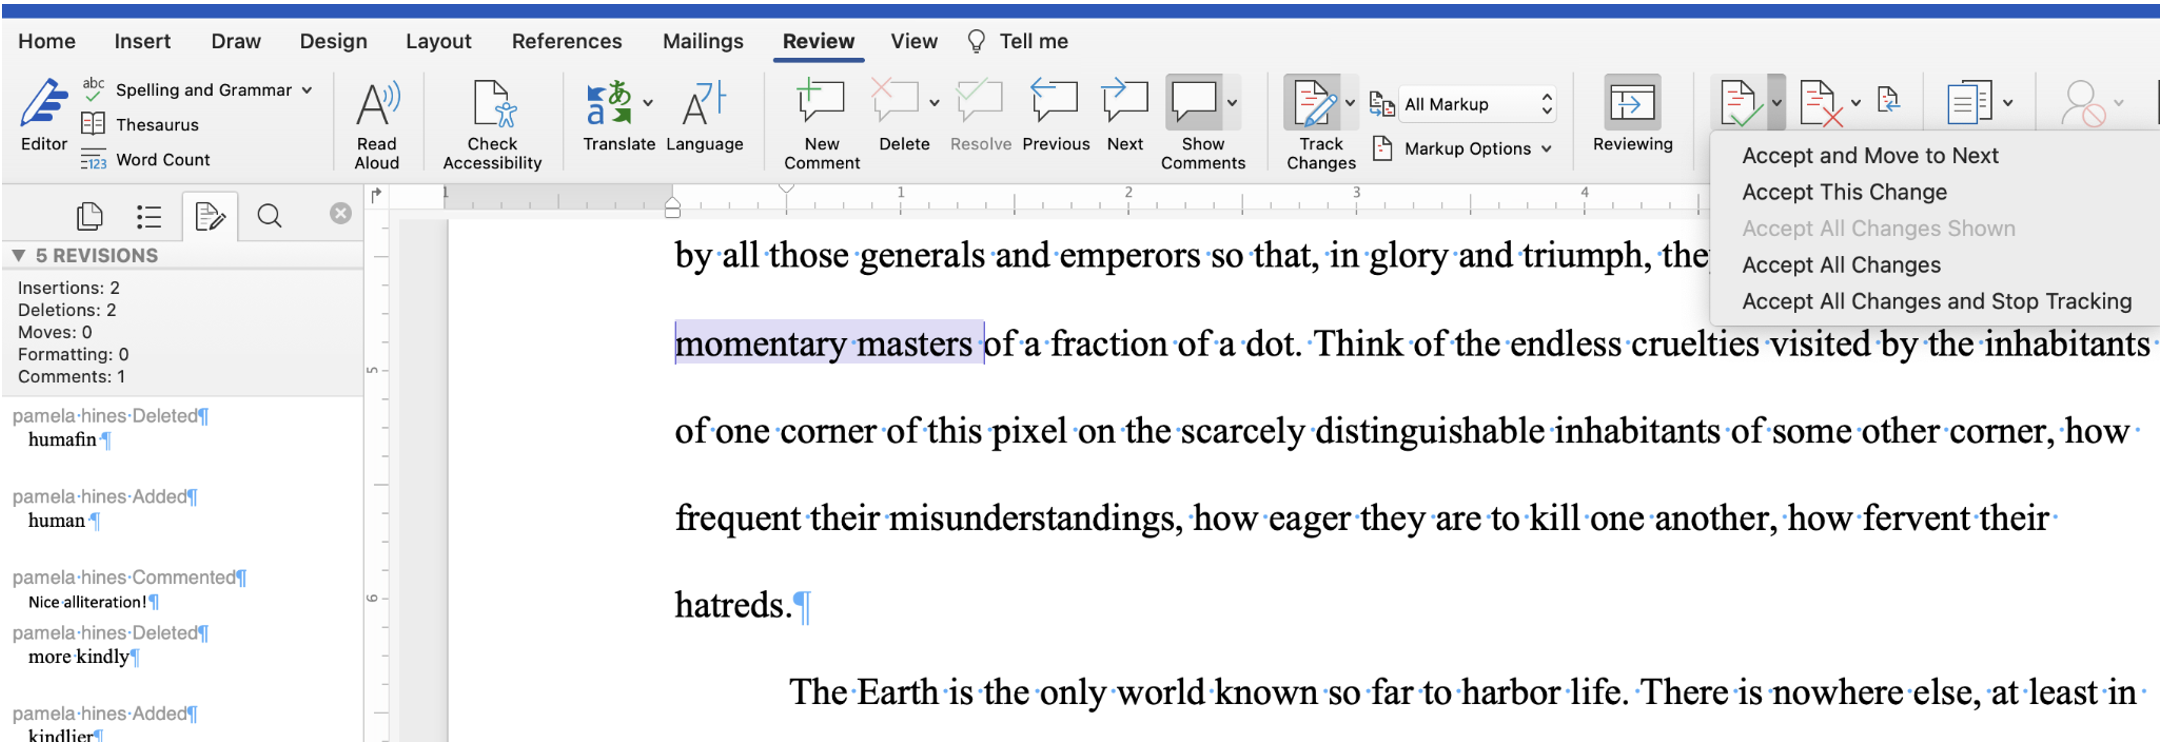
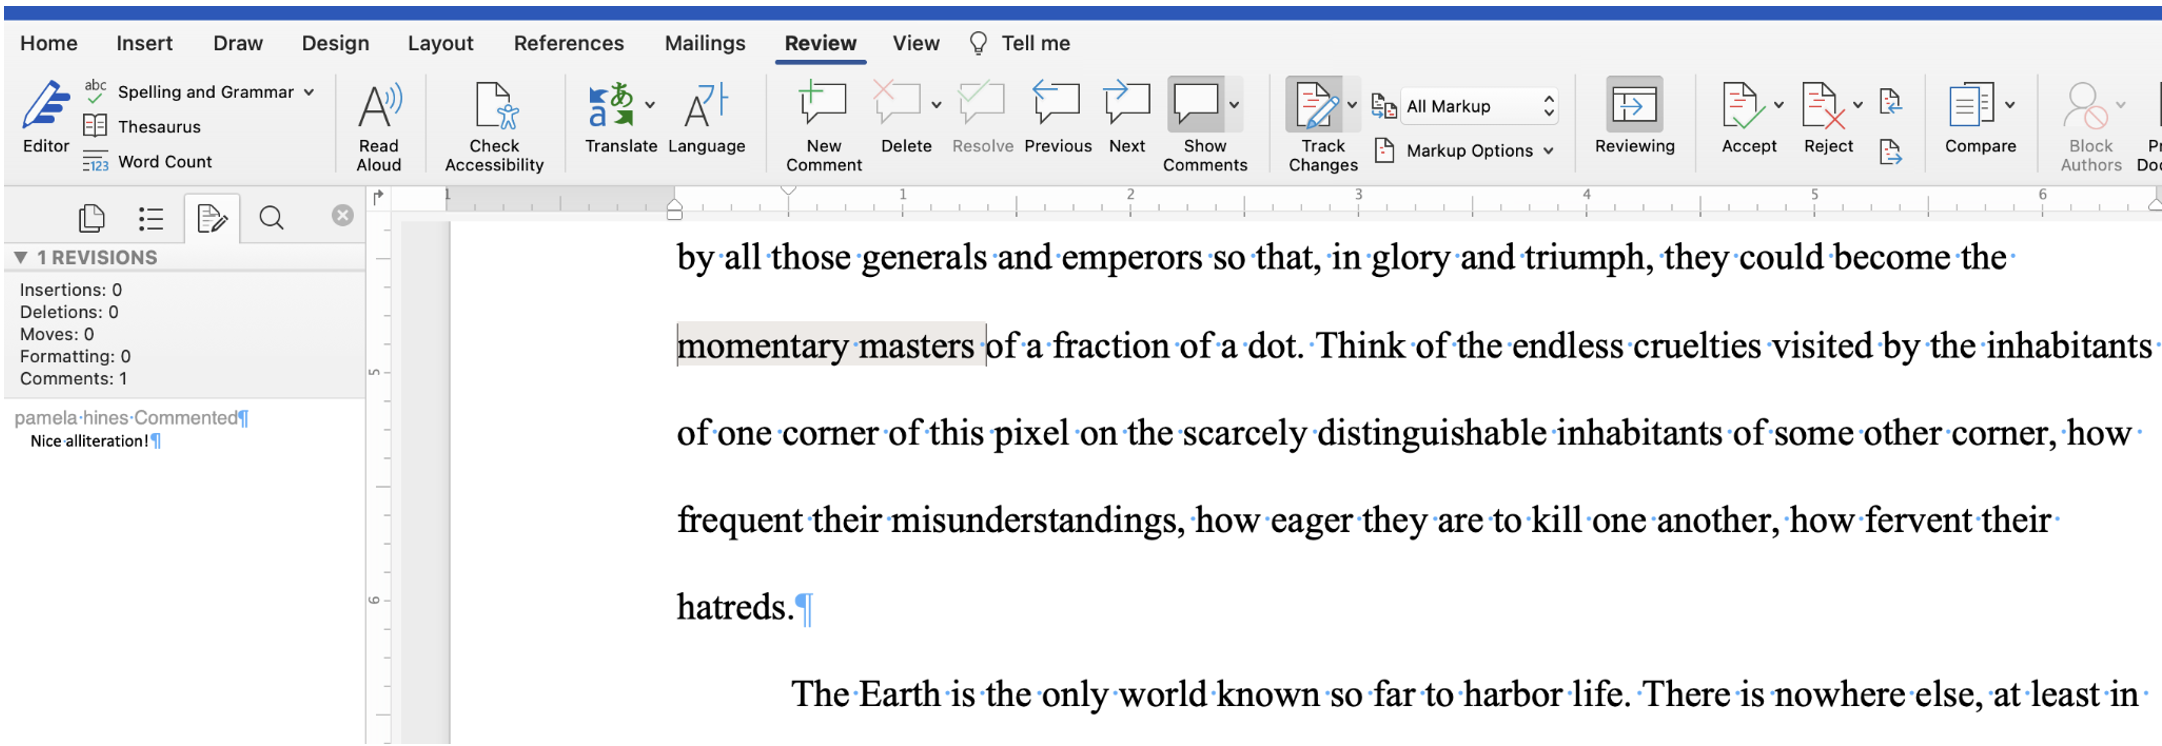
When finished, notice that the two insertions and deletions are gone, and only a comment remains. Turn off comments by deselecting the “show comments” button. Respond to or Delete the comment by clicking on the comment balloon itself.
When printing the document for review, indicate if you want to print with or without Markup. On a Mac, that’s in the print window under Microsoft Word. You may have to click on “Copies and Pages” to locate the Microsoft Word option. On Windows, click on the Settings dropdown in the Print menu and select or deselect “print markup.”
Use Track Changes to Level Up Your Drafts and Revisions
Use for Self-Editing
When performing self-revisions, do what professional editors do. Use track changes and comments to keep notes, questions, and revision ideas for yourself.
Even in the drafting process, you can stay in the writing flow by making notes of changes in comments, not stopping to research an issue. Use “TK,” an abbreviation for “to come,” as a placeholder for names, locations, and other details, so you don’t stop your writing momentum.
Use for working with Beta Readers
Beta readers need to know what you want from them. You want details about their experience as a reader, not their critique, analysis, or opinion about what you should change. Consider asking them to highlight a passage and add a comment when something confuses them, seems unbelievable or out of place, or when their attention wavers. This feedback gives you much more actionable information about areas that need improvement.
Use for Working with Professional Editors
Most professional editors use Track Changes to show a document’s deletions, additions, and moved words. They use comments to explain changes, show alternative phrasing, and ask questions (called querying.) The writer can read and address these queries directly in the comment balloon, engaging the editor with questions and clarifications. When you’re ready, address suggestions, comment, and accept and reject any changes.
Enhance your revision process with Track Changes and Comments. The time spent exploring it will pay dividends.
At Fictionary, we love story editing, and if you’d like to become one of the word’s best story editors, check out this post.
Post Written by Pamela Hines
 Pamela is a Fictionary Certified StoryCoach editor and a certified Story Grid editor. She will combine her Story Grid knowledge with technology and use Fictionary StoryCoach software to provide you with an exceptional story edit.


