

Following the Fictionary Story Editing Journey will lead you on a path to a bestselling novel.
Bestselling novels have well-structured plots, compelling characters, and engaging settings that tell a great story.
To to create a great story, you have to story edit. But performing a story edit is a complex cognitive task. Fictionary has made it easy with our new Story Editing Journey.
It’s a clear, step-by-step plan right in the software to help you systematically work your way through your edit. You’ll see exactly how to turn those valuable Fictionary insights into practical improvements in your story.
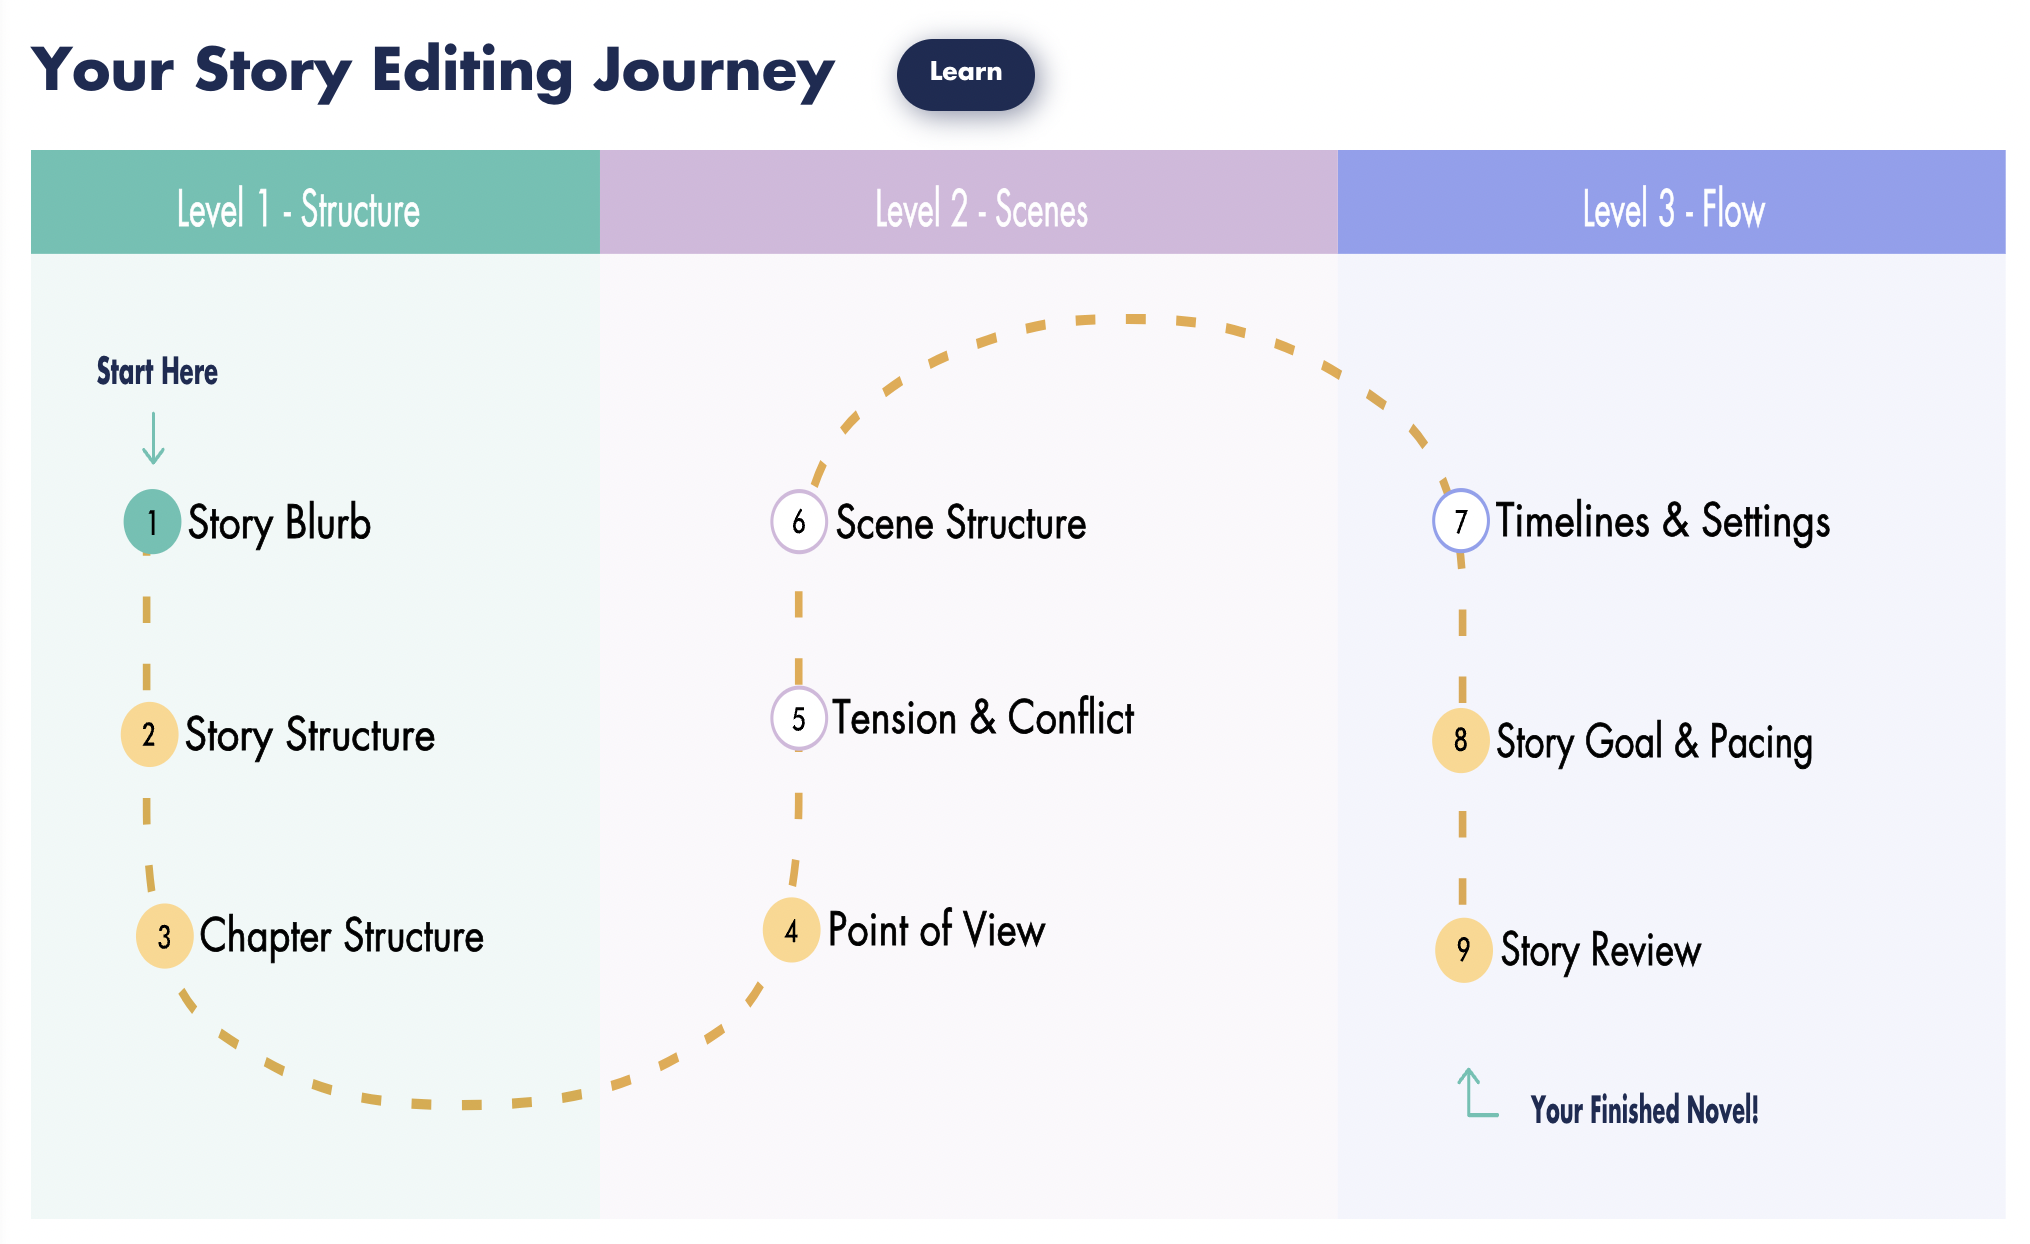
Step 1: Write a Skeleton Blurb
The Story Blurb is a promise to the reader of what to expect from a novel. A skeleton blurb is the shortest version of a story blurb (text on the back cover of your published book) that answers the questions:
- Who is the protagonist?
- What is their story goal?
- What are the story stakes?
It almost impossible to perform an efficient story edit without creating a skeleton blurb first.
Firstly, you must know who the story is about or the reader won’t know who to follow. This is the protagonist.
Secondly, the protagonist must have an external story goal, or they have nothing to do.
And thirdly, there must be something at stake if the protagonist fails to achieve the story goal; otherwise, the reader won’t worry. And if a reader doesn’t worry, there is no tension in the story.
Fictionary helps you create the skeleton blurb that you can refer to all the way through your edit. Click step 1 Story Blurb and create your skeleton blurb.
Without a Story Blurb, it’s hard to keep your editing focused.
So we want you to start there.
Work your way through the story editing journey. For each step you’ll find guidance within the Fictionary software on how to efficiently edit a novel.
You can come back to the Story Editing Journey at any time.
Step 2: Name the Scenes and View the Story Arc
Before you delve too far into a story edit, you’ll want to see the structure of the novel. To see the novel, you’ll need to name every scene and view the story outline and story arc that Fictionary automatically generated for you.
Fictionary names the scenes for you in seconds.
The top three reasons for naming scenes are:
- Determine the purpose of each scene.
- Structure scenes within your chapters, so they make the story stronger.
- Structure your story, so the pacing is strong and keeps the reader engaged until the last page.
Automatic Scene Naming and the Story Outline Insight gives you detailed instructions on how to name each scene.
Step 3: View the Chapter Structure
Once you’ve looked at the structure of the novel, it’s time to look at the chapter structure.
Click Chapter Structure on the Story Editing Journey.
Chapter structure is how you organize your scenes within a chapter. The length of a scene and the way you structure scenes within a chapter influence pacing, flow, and reader engagement. To review your chapter structure, start by viewing the Word Count per Scene and the Scenes per Chapter. Fictionary has automatically generated these insights for you.
Word Count per Scene
Look for scenes that are much shorter or longer than others. These may be places where the story is rushed or the pacing is slow.
Scenes per Chapter
Is the number of scenes per chapter balanced? Look for chapters with too many scenes. This may show the story is dragging or the chapters don’t have a theme.
Step 4: View the Point of View Characters
Now that you can visualize your novel in a whole new way, we’ll move on to characters. You’ve made an artistic choice to handle the point of view characters.
If you have one point of view character in your story, set this character in Fictionary, and move on to the next step.
If you write from multiple points of view, Fictionary helps you choose the best characters and make sure that your protagonist is getting enough page time.
When a writer chooses a POV character for a scene, they promise readers they will experience the scene from that character’s perspective. It’s time to evaluate whether your characters have the right amount of page time considering their importance in your story.
See your POV characters listed in one place, and evaluate the balance, placement, and scenes allocated to each POV character.
Step 5: Check each Scene for Tension and Conflict
You understand your story structure and you know your characters, so it’s time to move on tension and conflict. As this step in the story editing journey, you’re going start working with some of the 38 Fictionary Story Elements.
For a novel to be loved by many readers, every scene must have tension and conflict, but not just any tension and conflict. The tension and conflict in every scene must be related to the story goal you wrote in the skeleton blurb.
Step 6: Evaluate the Scene Structure
It’s starting to feel like your story is getting stronger. We all know stories are made of chapters, and chapters are made up of scenes. If every scene is strong, the novel has a better chance at being great.
In this step, you’ll evaluate and revise the structure at a scene level.
Step 7: Check the Timelines & Settings
When and where each scene takes place is important to the reader. For a reader to stay engaged in a story they must know when and where a scene is happening.
In this step, you’ll make sure you don’t let the reader down.
Step 8: Evaluate the Story Goal & Pacing
We said earlier, that the skeleton blurb is essential to performing a story edit. In this step, you use the goal written in the skeleton blurb to control story pacing.
Doesn’t that sound like a little bit of magic is happening?
Step 9: Story Review & Finish Your Story Editing Journey
You started with the story structure and you’ll end with the story structure.
Most likely, you moved scenes, added scenes, revised scenes, cut scenes, and split scenes. This all changes the structure of the story. Now you get to check is the structure is strong using the skeleton synopsis and the story arc.
